
Heavy Duty Garage Wall Mounts: An Engineer’s Guide to Mounting Heavy Tools Safely
This post contains affiliate links. We may earn a commission if you purchase through these links
Can’t smell Benzene? The AirThings Wave Plus tracks VOCs & Radon 24/7.
Most garage upgrades fail not because the equipment is bad, but because the mounting substrate (your wall) was ignored.
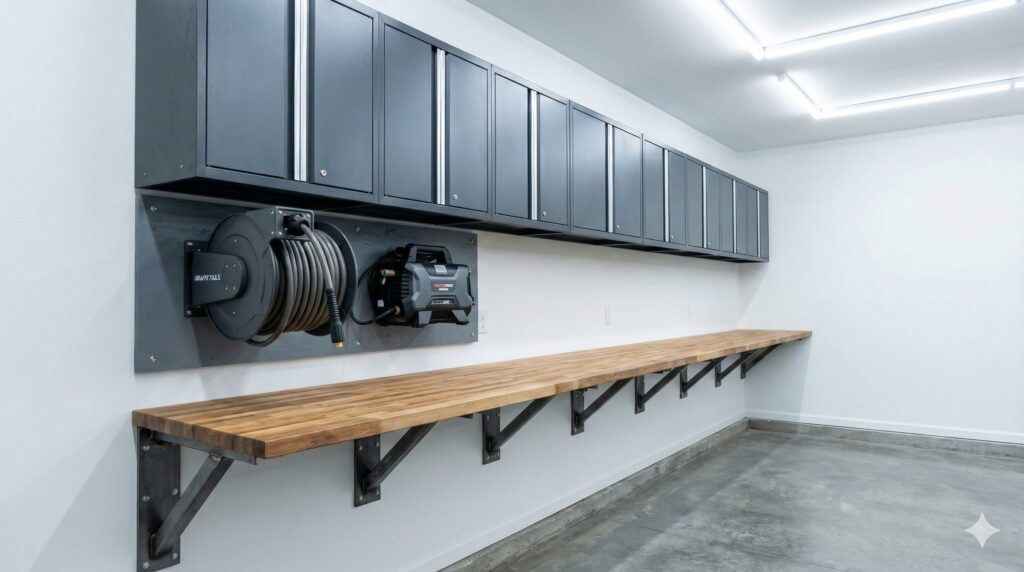
Heavy duty garage wall mounts are not just accessories — they are structural systems. When improperly installed, even the best wall-mounted pressure washer, cabinet, or workbench becomes a liability. This guide breaks down the engineering principles behind heavy duty garage wall mounts, showing you exactly how to calculate load limits, choose the right fasteners, and build wall systems that will not fail under real-world vibration and torque.
You cannot hang a 50lb retractable hose reel or a 300lb floating workbench on 1/2-inch drywall and hope for the best. Dynamic loads (vibration from pressure washers) and lever-arm forces (pulling a hose) turn standard anchors into dust.
As a Data Analyst, I don’t guess. I calculate. This is the high-authority guide to setting up a heavy-duty garage wall, considering shear strength, material density, and structural integrity.
Phase 1: The Anatomy of Your Wall (Substrate Analysis)
Before you buy a single screw, you must identify what you are drilling into. The “Toughness” of your wall dictates your equipment limit.
Garage Wall Structural Support: Why Your Wall Is the Real Load Limit
Garage wall structural support is the most overlooked factor in wall-mounted storage failures. The limiting factor is rarely the bracket or the product rating — it’s the wall assembly behind it. Stud spacing, material density, fastener embedment depth, and vibration tolerance determine whether a wall mount holds for 10 years or fails in 10 months.
Proper garage wall structural support means designing the wall as a system, not a surface. This is why professional installers always reinforce drywall with plywood backer boards and never rely on decorative wall panels for load-bearing applications.
1. Wood Studs (The Gold Standard for Mounting Garage Cabinets to Studs)
- Material: Douglas Fir or Pine (Standard 2×4 or 2×6).
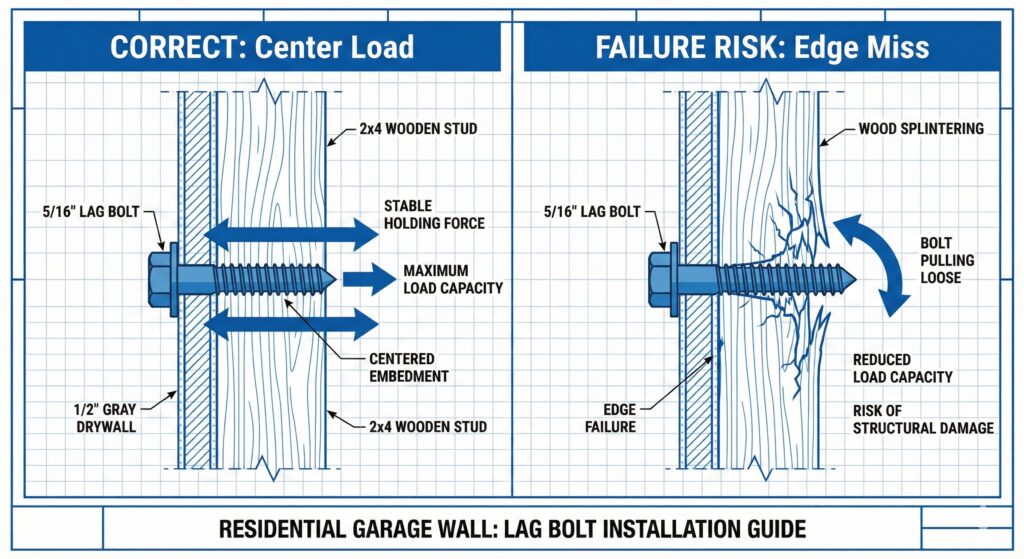
- Load Capacity: A single 5/16″ lag bolt into the center of a fir stud has a pull-out strength of roughly 380 lbs per inch of thread penetration.
- The Risk: “Missed Center.” If you drill 1/4″ off-center, you lose 60% of that holding power.
- Verdict: Best for heavy dynamic loads (Pressure Washers, Reels, Floating Shelves).
2. Poured Concrete / Concrete Block (CMU)
- Material: 3000+ PSI Cured Concrete.
- Load Capacity: Massive compression strength, but brittle under tension.
- The Risk: Cracking. You cannot use expansion anchors in the top 3 inches of a concrete wall (the “tension zone”) or they will crack the foundation.
- Verdict: Excellent for static loads (Cabinets), tricky for vibration.
3. Brick (The Deceiver)
- Material: Clay fired brick.
- The Risk: Brick is often hollow or “frogged.” It is not structural. Never mount heavy dynamic loads (like a hose reel) directly into a single brick. The vibration will crumble the mortar.
- Verdict: Requires chemical anchors or “pass-through” mounting. Avoid for high-torque gear if possible.
4. Metal Studs (The Trap)
- Material: 25-gauge galvanized steel.
- The Risk: These are designed for vertical compression (holding up the roof), not horizontal torque. A lag bolt will spin freely. A toggle bolt will rip the stud open.
- Verdict: DO NOT mount heavy equipment to metal studs without wooden blocking reinforcement.
When mounting garage cabinets to studs, center placement is non-negotiable. Even premium cabinets fail when lag bolts land off-center or lack sufficient embedment depth. For heavy cabinets, spanning two studs with a plywood backer board increases shear capacity and eliminates point-load stress that causes drywall compression and long-term sag.
Phase 2: The Physics of Mounting (Shear vs. Tension)
Understanding these two forces will save your car from being crushed by a falling cabinet.
| Force Type | Definition | The Killer | The Fix |
| Shear | Downward force (Gravity). | Undersized bolts snapping off. | Use Grade 5 or 8 Lag Bolts (Zinc or Galvanized). |
| Tension | Pull-out force (Pulling away from wall). | Hoses, Vises, Reel springs. | Increase Embedment Depth (3″ minimum). |
| Dynamic | Vibration (Motors/Engines). | Loosening nuts over time. | Use Threadlocker (Blue) and Lock Washers. |
Lag Bolts vs Concrete Anchors: Choosing the Right Fastener for Heavy Duty Garage Wall Mounts
The debate between lag bolts vs concrete anchors is not about strength — it’s about load behavior. Lag bolts excel in wood studs because wood absorbs vibration and distributes shear loads over thread length. Concrete anchors, while extremely strong in compression, are brittle under tension and vibration if improperly placed.
For heavy duty garage wall mounts, lag bolts are the preferred fastener for dynamic loads like pressure washers and hose reels, while concrete anchors are best reserved for static loads such as wall cabinets or shelving systems mounted directly to poured concrete walls.
Using the wrong fastener doesn’t reduce capacity gradually — it causes sudden, catastrophic failure.
The “Lever Arm” Calculation
If you mount a 24-inch deep workbench, a 50lb weight placed at the edge applies significantly more torque to the wall anchors than 50lb sitting against the wall.
- Rule of Thumb: For every 12 inches of depth, upgrade your fastener diameter by 1/16″.
- Pressure Washer Rule: A running pressure washer vibrates. This turns a static 30lb load into a dynamic load that creates micro-fractures in drywall. You must mount these to a plywood backer board spanning two studs.
Phase 3: The Heavy-Duty Installation Protocol
This is the standard operating procedure (SOP) for mounting any gear over 40 lbs (e.g., Active 2.0, Giraffe Reel, NewAge Cabinets).
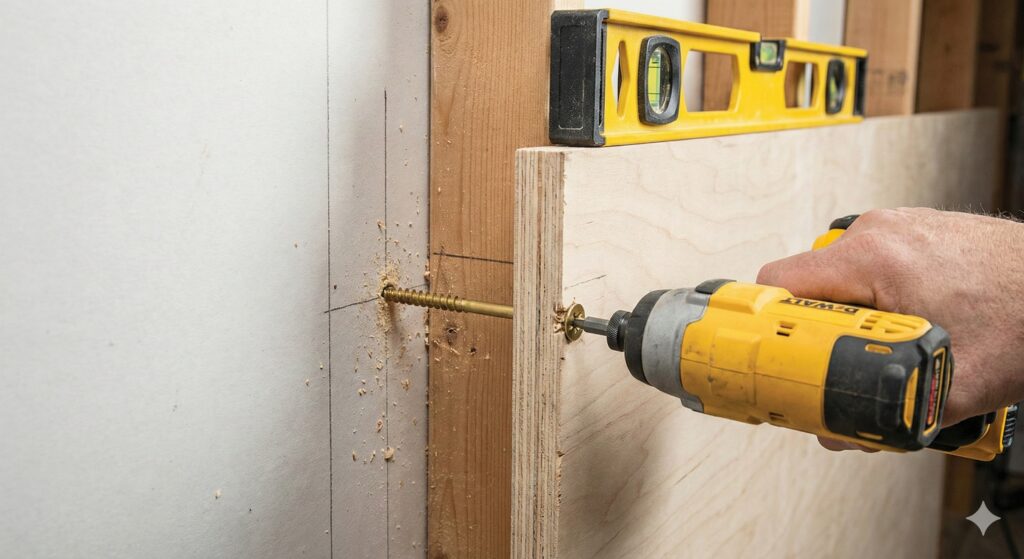
Step 1: The “Backer Board” System
Do not mount directly to drywall. It compresses and cracks.
- Material: 3/4″ Construction Grade Plywood (Birch or Fir).
- Size: Cut it to span at least two studs (usually 16″ or 32″ wide).
- Mounting: Use (4) 3-inch #10 Structural Screws (GRK or Spax) to lock the plywood to the studs.
- Why: This acts as a “load distribution plate,” spreading the vibration across the entire wall frame rather than a single point.
Step 2: Fastener Selection (The Data)
Stop using the plastic anchors that come in the box. They are garbage.
- For Wood: 5/16″ x 3.5″ Lag Bolts. (Requires 3/16″ pilot hole).
- For Concrete: 3/8″ Wedge Anchors (Red Head or Hilti).
- For Drywall (Light loads only): Snaptoggle (The only drywall anchor I trust).
Step 3: The “Pull Test”
Before putting your $3,000 pressure washer on the wall, hang your body weight (if safe) or a 50lb weight on the bracket.
- Listen: Do you hear crunching? (Drywall failing).
- Watch: Does the bracket flex? (Low gauge steel).
Best Wall Mount for Heavy Tools: What Actually Matters
The best wall mount for heavy tools is not defined by brand — it’s defined by steel gauge, mounting hole geometry, and load distribution. Look for mounts made from 14–18 gauge steel, slotted mounting holes that allow stud alignment, and brackets rated for dynamic loads, not just static weight.
For tools with motors, springs, or moving parts, wall mounts must be paired with structural reinforcement. Even the strongest bracket will fail if the wall behind it flexes under load.
Phase 4: Recommended Heavy-Duty Gear
Based on structural data and safety features, these are the “Data Analyst Approved” picks.
1. Pressure Washer Wall Mount Setup (Vibration-Safe Installation)
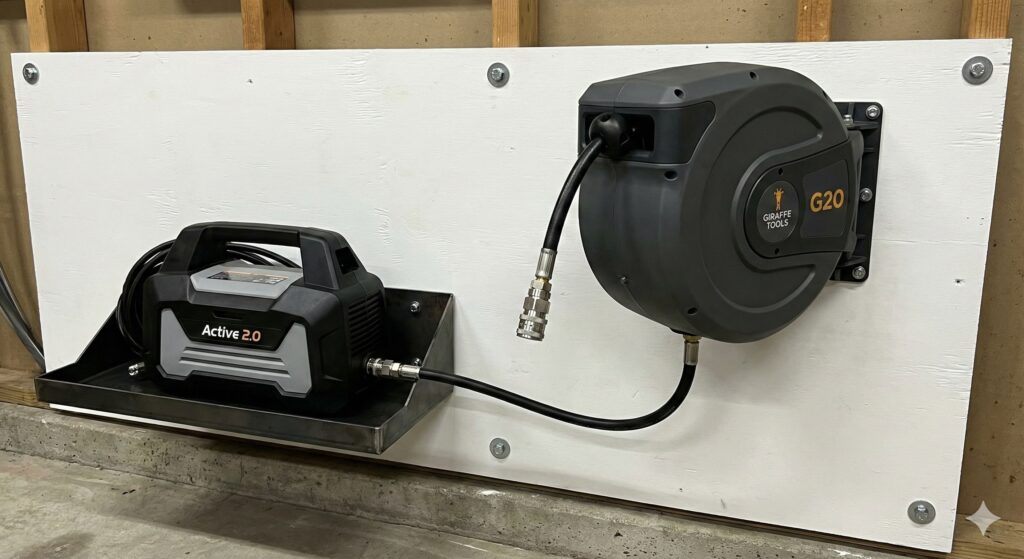
A proper pressure washer wall mount setup must account for vibration, hose pull force, and motor startup torque. While most pressure washers weigh under 30 lbs, the dynamic load during operation can exceed 2–3x the static weight. This is why pressure washer wall mounts should always be installed into studs or reinforced backer boards — never drywall alone.
- The Washer:Active 2.0.
- Why: It has a metal pump housing (durable) but weighs less than 25 lbs (low wall load).
- The Reel:Giraffe Tools G20.
- Mounting: MUST be mounted 6+ feet high.
- Force Data: The retraction spring pulls with ~15lbs of force. If not mounted to a stud, it will rip out.
- The Safety Factor: Use a 15-Amp GFCI outlet nearby. Water + Electricity = Death without GFCI.
For a breakdown of vibration-safe brackets, hose routing, and stud-mounted installations, see our full guide on the wall mounted pressure washer setups that are engineered specifically for garage walls.
2. The Floating Workbench
- Recommendation: Rack It 1000KG System or NewAge Bold Series.
- Feature: Look for 18-Gauge Steel or thicker (lower gauge = thicker steel).
- Bench Depth: Stick to 20-24 inches. Anything deeper than 24″ creates too much leverage torque on a wall-mount system unless it has front legs.
If you’re installing a floating or wall-supported bench, these principles are critical when choosing from the best adjustable garage workbenches, especially models designed for stud-only or hybrid wall mounts.
3. The “Health” Monitor
- Gear: Inkbird CO Monitor or Kidde Heat Alarm.
- Why: As discussed in our [Benzene Article], you need to monitor air quality if you work in the garage.
Phase 5: Safety & Security Checklist
- 1. The “Head Clearance” Rule: Mount overhead racks (like Fleximounts) at least 7 feet off the ground or 12 inches above your garage door rails.
- 2. The “Chemical” Zone: Flammable liquids (gas, thinners) should be stored in a metal cabinet, not on open wooden shelves (Fire risk).
- 3. The “Trip” Hazard: Keep all hoses off the floor. This is why the Giraffe Reel is a safety device, not just a luxury. It removes the #1 cause of garage injuries (tripping).
For garages with frequent access or remote monitoring needs, pairing structural upgrades with the best smart garage door controllers adds real-time alerts that protect both your tools and the wall-mounted systems supporting them.
Any garage running power tools, pressure washers, or wall-mounted equipment should also account for heat output and circuit load, which is why we recommend reviewing the best garage heaters that are safe for enclosed, equipment-heavy garages.
🔹 FAQ: Heavy Duty Garage Wall Mounts (Safety, Loads & Installation)
Q1: Can drywall anchors support heavy duty garage wall mounts?
No. Drywall anchors are not designed for dynamic or vibration loads. Heavy duty garage wall mounts must be secured into wood studs, reinforced backer boards, or concrete using rated fasteners.
Q2: What is the safest way to mount garage cabinets to studs?
The safest method is to span at least two studs using a 3/4-inch plywood backer board, then secure the cabinet rail with lag bolts driven into stud centers.
Q3: Are lag bolts or concrete anchors better for garage wall mounting?
Lag bolts are best for wood studs and dynamic loads. Concrete anchors are ideal for static loads but require proper edge distance and embedment depth to prevent cracking.
Q4: How should a pressure washer wall mount setup be installed?
Pressure washers should always be mounted into studs or reinforced plywood backers to handle vibration and hose pull forces. Drywall-only mounting will eventually fail.
Q5: What is the best wall mount for heavy tools?
The best wall mount for heavy tools uses thick-gauge steel brackets, stud-aligned mounting holes, and fasteners rated well above the tool’s operating load.
🔹 Heavy Duty Garage Wall Mount Comparison (Engineer-Approved)
| Use Case | Typical Load | Mounting Requirement | Best Resource |
|---|---|---|---|
| Wall-Mounted Pressure Washer | 25–40 lbs (dynamic) | Studs + plywood backer | Wall-mounted pressure washer |
| Floating Workbench | 150–300 lbs | Two studs or concrete | Best adjustable garage workbenches |
| Garage Cabinets | 100–400 lbs | Concrete or stud rail | Best smart garage door openers |
| Hose Reels & Heavy Tools | Medium vibration | Stud-only | Best smart garage door controllers |
| Heated / Tool-Heavy Garage | Electrical + heat load | Code-compliant | Best garage heaters |
🔹 ProGarageGear Garage Infrastructure Pillar Hub
This guide is part of the ProGarageGear Garage Infrastructure Pillar, designed to help homeowners build safer, stronger, and smarter garages:
- Structural Systems: Heavy Duty Garage Wall Mounts (this guide)
- Health & Air Quality: Attached Garage Health Risks – Benzene & CO Data
- Utilities & Cleaning: Wall-Mounted Pressure Washer Systems
- Lighting & Visibility: Best Garage Lighting (CRI & Lumens Explained)
- Security & Access: Smart Garage Door Openers & Controllers
Together, these guides form a complete framework for building a garage that is structurally sound, healthy, well-lit, and secure.
Final Word: Build for the Worst Case
Engineers design bridges to hold more than the maximum traffic. You should design your garage wall to hold more than your tools.
If a shelf is rated for 200 lbs, treat it as 100 lbs. If a bolt is rated for 50 lbs shear, use two. Over-engineering is the only way to sleep soundly knowing your expensive gear won’t crash onto your hood in the middle of the night.
Data & Standards Referenced
ASHRAE Standard 62.2 – Residential Ventilation