
The Untold Truth About Hexagon Garage Lights: 2025 Buyer’s Guide, Real Costs & Installation Facts
By Pro Garage Gear Team | Estimated Read Time: 8 Minutes
This post contains affiliate links. We may earn a commission if you purchase through these links
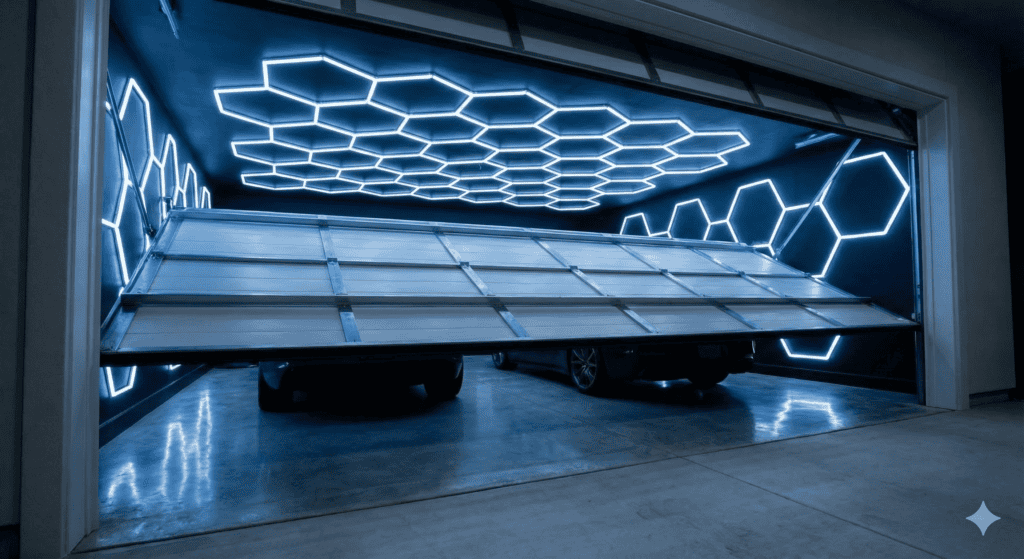
The “Instagram Trap”: You’ve seen the viral videos. A garage door opens, revealing a sleek, glowing honeycomb ceiling that looks like a scene from Tron. You want it. But before you drop $300 and drill 60 holes in your drywall, you need to know the difference between a “Lighting Upgrade” and a “Fire Hazard.”
Most blog posts will tell you these lights are “cool” and send you to a generic Amazon link. We aren’t going to do that.
We are going to talk about CRI (Color Rendering Index), Radio Frequency Interference, and Voltage Drop—the three things that actually determine if your new lights will help you detail your car or just give you a headache.
What are the differences between the various hexagon garage lights?
If you are ready to build a showroom-level garage, this is the only guide you need.
🏆 The “Cheatsheet” Comparison Table
If you are in a rush, here is how the top contenders stack up. Pay attention to the CRI column—this is the most important spec for car enthusiasts.
| Feature | Hexagon Garage (Official) | Gonengo (Amazon Best Seller) | Generic AliExpress/eBay |
| Best For… | Pro Detailers & Showrooms | DIY Homeowners | Risk Takers |
| CRI Rating | >90 (True Color) | >80 (Standard) | <70 (Washed Out) |
| Housing | Aluminum Body | PVC / Plastic | Thin Plastic |
| Connectors | Reinforced | Standard Plastic | Brittle Plastic |
| Lumens | ~60,000+ | ~26,000 | ~20,000 |
| Warranty | 5 Years | 2 Years | “Good Luck” |
| Interference | Shielded Drivers | Minimal Issues | High Risk |
| Price | $$$ | $$ | $ |
| Link | [Check Price] | [Check Amazon] | N/A |
The Science: Why “CRI” is the Secret Sauce
Most people buy garage lights based on Brightness (Lumens). This is a rookie mistake.
You can have a light that is blindingly bright, but if it has a low CRI (Color Rendering Index), your car paint will look “dead.”
- CRI < 80: Reds look muddy. Blues look grey. You cannot accurately match paint or see the depth of a ceramic coating.
- CRI > 90: This is “High Definition” for your eyes. Red pops. Metallic flakes sparkle.
The Crusher Insight:
Most cheap “Hex Lights” on eBay use low-quality LED chips with a CRI of 70. They are bright, but they make your garage feel like a hospital operating room—sterile and cold.
If you are building a detailing bay, do not settle for anything less than CRI 80. The [Gonengo Kit] hits this sweet spot for the price, while the premium kits push CRI 90+.
🛠️ The Installation “Horror Story” (And How to Avoid It)
Competitors tell you it’s “Plug and Play.” They are lying.
Installing a 16×8 foot grid on a ceiling is a construction project. Here is the reality of what it takes to get that seamless look.
1. The “Sag” Factor
Cheap kits use plastic connectors. Over time, gravity pulls on the long LED tubes. If you only mount the corners, the middle of your hexagon grid will start to sag and bow within 6 months.
- The Fix: You cannot skimp on anchors. You need a mounting clip every 2 feet. Yes, that means drilling roughly 40-50 holes in your ceiling.
2. The “Hardwire” Myth
Most of these kits come with a standard 3-prong plug. But nobody wants an ugly black cord dangling from their ceiling to a wall outlet.
- The Fix: You need to cut the plug off and hardwire it into an existing ceiling junction box (where your old bulb was).
- Warning: If you aren’t comfortable with wire nuts and voltage testers, hire an electrician. A bad neutral connection here can cause the LEDs to strobe.
3. The Layout Grid (Use the Floor First)
Do not start mounting on the ceiling. Assemble the entire grid on your garage floor first.
- Why: 1 in 100 LED tubes might be dead on arrival. If you mount it all and then flip the switch to find a dead bar in the center, you will cry. Test it on the floor.
⚠️ The Hidden Problem: Garage Door Interference
Here is something no one talks about.
Cheap LED drivers (the power box that runs the lights) emit RFI (Radio Frequency Interference). This frequency often sits between 300MHz and 400MHz.
- The Problem: Your garage door opener remote also operates at 315MHz or 390MHz.
- The Symptom: You install your cool new lights. You drive home. You click your remote. Nothing happens. The lights are “jamming” the signal.
The Solution:
- Buy Shielded: Higher quality kits (like the ones we recommend) use shielded drivers to prevent leaks.
- Ferrite Cores: If you buy a budget kit, snap a [Ferrite Core Ring] (a $5 magnet) onto the power cord of the light. It chokes the interference.
⭐️ Detailed Reviews: The Good, The Bad, & The Ugly
1. The “Smart” Buy: Gonengo Hexagon Grid System
This is the kit that 90% of you should buy. It strikes the perfect balance between “Professional Look” and “DIY Price.”
- The Pros: The connectors are tight. The color temperature is a crisp 6500K (Daylight), which keeps you awake and focused.
- The Cons: It is bright. Too bright for a dinner party, but perfect for working. It is not dimmable out of the box.
- Verdict: If you want the Instagram look for under $200, this is the undisputed king.

2. The “Showroom” Splurge: Hexagon Garage Aluminum Series
If you own a Porsche, don’t put plastic lights above it.
- The Pros: The housing is aluminum, which dissipates heat better than plastic. Heat is the enemy of LEDs; cooler LEDs last 50,000+ hours. The CRI is 90+, meaning your paint will look liquid.
- The Cons: It costs 3x more than the Amazon kits.
- Verdict: Buy once, cry once.

💡 Design Ideas: You Don’t Have to Do a Rectangle
One of the coolest features of these modular systems is the ability to break the mold.
- The “Runway”: Instead of a massive grid, run a single line of hexagons down the center of the car bay.
- The “Wall Wrap”: Run the lights up the wall and onto the ceiling. This creates a “light tunnel” effect that is incredible for side-panel detailing.
Final Verdict: Are They Worth It?
We were skeptical. We thought they were just a TikTok trend.
But after working under them, we can never go back to bulbs.
The elimination of shadows changes how you work. You stop losing 10mm sockets. You spot swirl marks you never knew existed. You feel more energized working in the bright, clean light.
If you are ready to transform your “Dungeon” into a “Studio,” the Hexagon Light is the single most impactful visual upgrade you can make.
Just remember: Buy extra drywall anchors. You’re going to need them.
[Shop the Gonengo Kit on Amazon]
Once you have the lights installed, use our checklist to keep the floor clean…
The perfect companion to your new lighting is a pro wash bay…